Call NPK LLC for assistance with any CFD (Turbo) Adjustments or Replacement Parts
Contact us at 614-738-8208
*****************************************************************

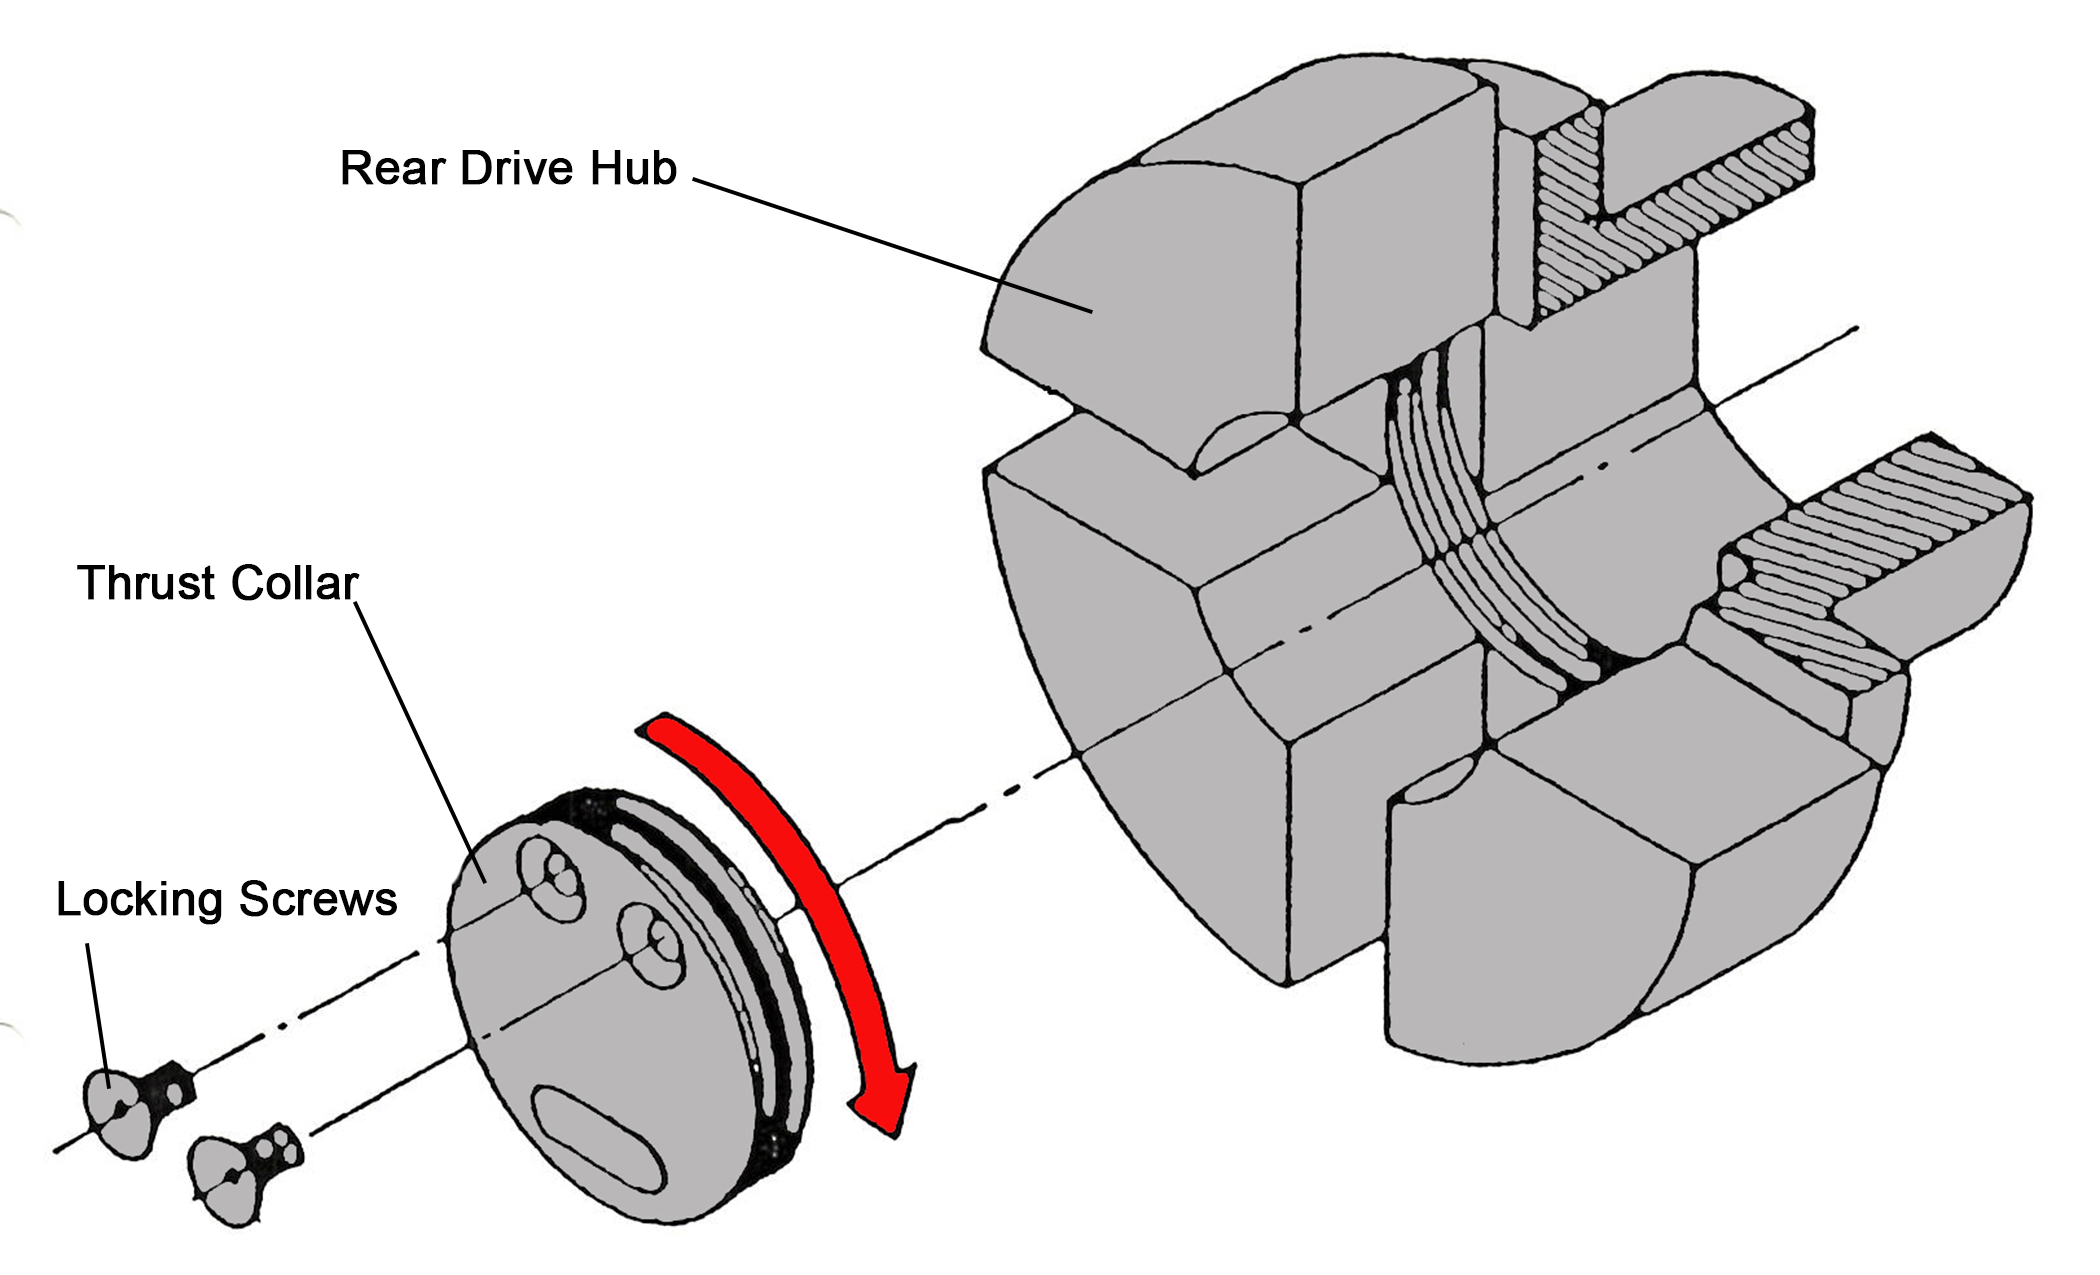
Tools and items required to adjust the Rear Drive Hub
-
Two Clamps
-
Set of Handles for gate
-
Allen Wrench for Locking Screws
-
Food Grade Grease
-
8" Crescent Wrench or other tool that will fit
into the opening of the Thrust Collar
Steps to follow:
-
Loosen the Locking Screws
-
Make sure the Thrust Collar is loose and can
freely rotate in and out of the threads of the
Rear Drive Hub. -
Remove the Thrust Collar and grease the
threads with Food Grade Grease
The Rear Drive adjustment is extremely important to ensure the Pallets are not rubbing against the face of either the
Suction or Pressure Gate. If the Pallets are rubbing on the surface of the gates it will result in damage to the Pallets and
either the Suction or Pressure Gate. This damage will result in possible metal contamination of the product and will reduce
the life of the parts.
Inspect the Gates and Drive Hubs for burrs, remove burrs if any are found.
This Rear Drive Hub adjustment must be performed daily. The following factors is why this adjustment will vary daily.
-
The Trust Collar was removed or Rear Drive Hub replaced
-
The Suction Gate was replaced
-
The Clamp Housing replaced
-
The Auger reworked or replaced
-
The gearbox replaced
Adjustment Procedure
-
Install the Auger
-
Install the Suction Gate (Make sure the black o-ring has been removed)
-
Clamp the gate securely to the face of the CFD Clamp Housing
-
Adjust the Thrust Collar in until it makes contact with the end of the Auger
-
Continue to rotate the Thrust Collar inward until the Rear Drive Hub begins to separate from the face of the Suction
Gate -
Once the gap is between 0.2 and 0.5mm stop. You can also use the CFD Tool shown below to help set the gap as
well. -
Hold the position of the Thrust Collar and securely tighten up the two Locking Screws
-
Insert the Rear Pallet and confirm the Pallet is not touching the face of the Suction Gate. If it is then repeat the steps
above until the correct adjustment is obtained.
For additional support call NPKLLC @ 614-738-8208 or 614-716-9820 or email us at NPKLLC@aol.com


The Star Knife adjustment is very important to ensure the knife is running tight against the Pre-Cutter. However if it's to tight against the Pre-Cutter it will cause damage to the edges of the knife. This will result in metal contamination of the
product.
This Star Knife adjustment must be performed daily. The following factors is why this adjustment is required daily.
-
Star Blade Sharpening
-
Pre-Cutter Sharpening
-
Replacement of the Star Knife or Pre-Cutter with a new one
-
The Auger reworked or replaced
-
The gearbox replaced
-
The White Plastic Spacers lost or installed differently
Adjustment Procedure
-
Install the Auger
-
Install the Orange O-Ring
-
Install the 2mm White Plastic Spacer
-
Install the Pressure Ring
-
Install the Star Blade
-
Install the 10 Hole Pre-Cutter
-
Install the Suction Gate (The black o-ring must be left off)
-
Squeeze the Suction Gate by hand against the face of the CFD Clamp Housing
-
Check the gap (See the detail above) The gap should be between 1 and 1.5 mm
-
If the gap is below 1mm the knife will not cut correctly
-
If the gap is greater than 1.5mm the knife will be too tight and the knife will heat up and cause the edges to chip off.
This will result in metal contamination of the product -
Make the adjustment by removing or adding additional White Plastic Spacers. Spacers are available in 1, 2 and 3mm
For additional support call NPKLLC @ 614-738-8208 or 614-716-9820 or email us at NPKLLC@aol.com
We also have lots of breakout diagrams like shown below available for you to help with rebuilding and ordering parts for your gearboxes, they are located here on our Diagrams page for your convenience.
We are constantly adding more so if you do not see one you need please contact us and we can send it to you